My focus this week was on formatting JavaScript objects properly and properly converting them to JSON strings to eventually be sent from client to server.
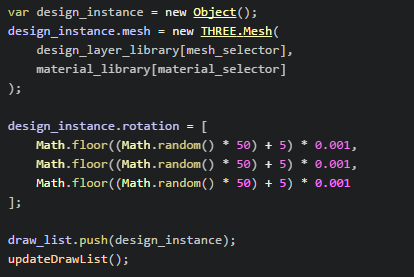
First, I had to deal with the fact that in addition to using existing three.js objects (such as Mesh), we will need to have custom data associated with each user generated design element. For example, a 3D cube shape will (in the backend) need to be comprised of a three.js Mesh object and rotation data. In the following code block, we can see how I've set up this example object to be created on user request.

JavaScript object creation
Another example would be a particle system. Each particle could be a three.js Mesh object. In addition to a member Mesh variable, each particle would also need position and velocity data. The particle system itself will need its own custom attributes - and everything must be compatible with the three.js object types.
It's easy to convert JavaScript objects to JSON text, but a specific function is necessary to first prepare three.js objects for JSON conversion.

This function serializes the complex object defined above.
As can be seen in this function, the Mesh.toJSON() function must be used to prepare a three.js object (such as a Mesh) for JSON string conversion. The following code does the reverse process - it parses incoming JSON text and converts it into an object usable by the Kubus rendering engine.

This function converts JSON text back into a usable JavaScript object
In MIA_3/Project Drop/JSON_encoding_and_parsing, index.html will run a version of the Kubus engine with functional JSON conversion and parsing.
Instructions:
'a' - add a cube object to be converted
's' - serialize all data
'p' - parse all data
'm' - toggle object motion
To test the functionality:
- hit 'a'
- hit 's'
- hit 'p'
- hit 'm' (optional)
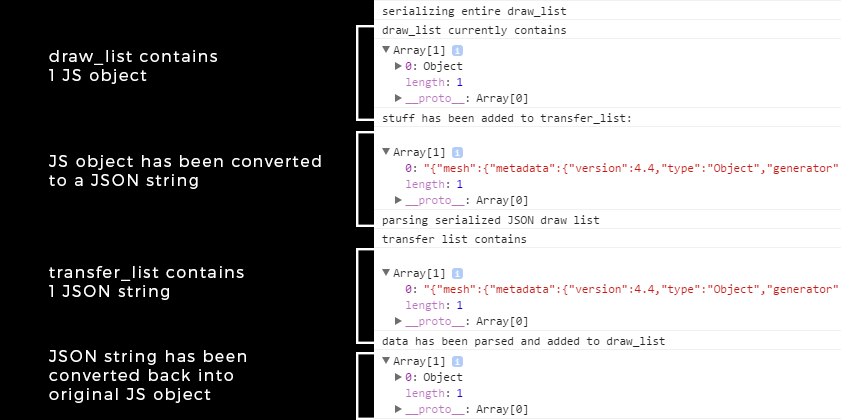
Looking at the JavaScript console, we can see the JSON conversion processes happening:

The JavaScript console prints out the results of the JSON conversions
Due to the way that current scene data is handled with the draw_list array and the three.js scene variable, after you've added, serialized, parsed and motion toggled a(some) objects, any additional objects added to the scene will not move correctly. Of course, JSON conversion and parsing isn't meant to be used within a single instance of the web application, so this scene drawing bug is not related to the topic at hand.
To test by adding multiple cube objects, reload a new instance of the program and hit 'a' multiple times before serializing the data.

5 cube meshes being converted to JSON, and parsed back into JavaScript objects
The next step concerning the development of this web application is sending JSON strings through Node.js from client to server.